Basic Procedural Desert Generation and Rendering in Unity


Introduction
Update: Fixed some typos
In this blog post we present a simple way to generate a desert and then render it with custom shaders in Unity.
While developing Perpetual Wizard we found ourselves in the need of generating a desert at runtime. Even though we are using pre existing techniques, we figured out this approach from scratch. We know that more realistic results can be achieved but the final look is good enough for Perpetual Wizard since it has a non realistic style (stylized low poly, heavily influenced by Lara Croft Go). We are quite happy with the results and think it’s a good starting point for a more realistic look.
Mesh Generation
The idea to the mesh generation is pretty simple. We consider our desert to be a box with dimensions Width x Depth x Height. With that in mind, for each unit in the base (x and z coordinates):
- We create a vertex and two triangles with this vertex and the vertices next to it.
- The height (y coordinate) of the vertex is computed using Perlin Noise to simulate the desert dunes.
Perlin Noise is a technique used to create textures. The resulting patterns are pseudo random and have a natural appearance. Since Perlin Noise is a gradient noise, the values change smoothly and it works to compute our dunes height. Even though the technique works in N dimensions, in Unity is implemented in two, with the function Mathf.PerlinNoise.
List<Vector3> vertices = new List<Vector3>();
List<int> triangles = new List<int>();
List<Vector2> uv = new List<Vector2>();
for(int i = 0; i < Width; i++) {
    for(int j = 0; j < Depth; j++) {
        float xCoord = (i / (float) Width) * NoiseScale;
        float yCoord = (j / (float) Depth) * NoiseScale;
        float y = Height * Mathf.PerlinNoise(xCoord, yCoord);

        vertices.Add(new Vector3(i - Width * 0.5f, y, j - Depth * 0.5f));
        uv.Add(new Vector2((float) i / Width, (float) j / Depth));
        if(i == 0 || j == 0) continue; // First bottom and left skipped
        triangles.Add(Width * i + j); // Top right
        triangles.Add(Width * i + (j - 1)); // Bottom right
        triangles.Add(Width * (i - 1) + (j - 1)); // Bottom left - First triangle
        triangles.Add(Width * (i - 1) + (j - 1)); // Bottom left
        triangles.Add(Width * (i - 1) + j); // Top left
        triangles.Add(Width * i + j); // Top right - Second triangle
    }
}
Note how we scale the noise with NoiseScale. This value alters the speed or frequency of the noise, resulting in different dunes sizes.
Also, you might want to clamp the noise value as it may be a bit higher than 1.0 according to the documentation.
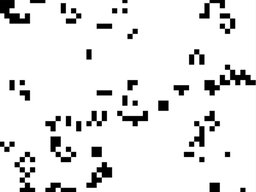
The image below illustrates how the triangles are created:
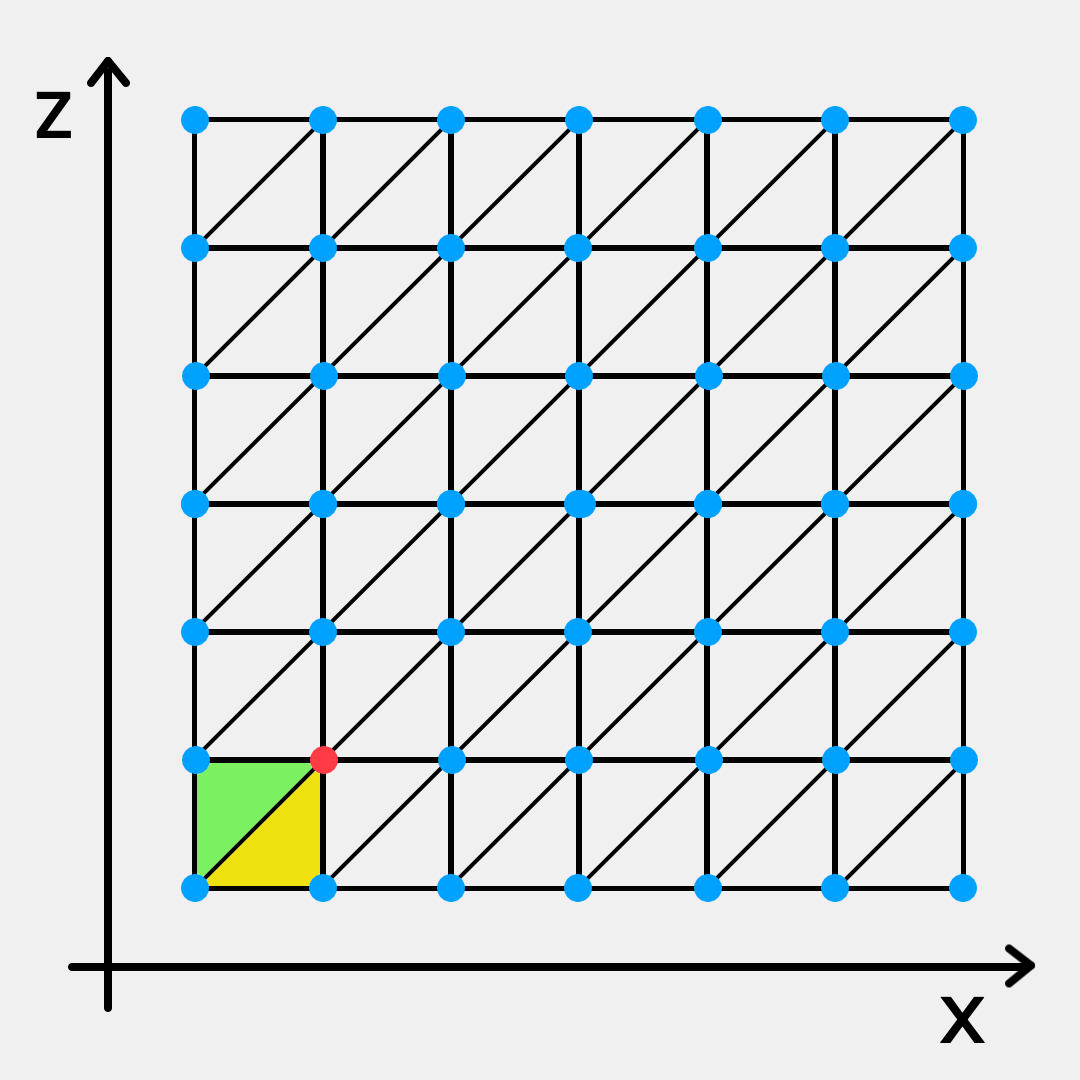
The first triangles are created for the red vertex (as we skip vertices in the bottom and in the left). The first created triangle is the yellow one and the second is the green one.
The next steps are creating the mesh, assigning the values computed before and setting up the MeshRenderer:
Mesh mesh = new Mesh();
mesh.vertices = vertices.ToArray();
mesh.uv = uv.ToArray();
mesh.triangles = triangles.ToArray();
mesh.RecalculateNormals();

MeshFilter meshFilter = gameObject.AddComponent<MeshFilter>();
Renderer ren = gameObject.AddComponent<MeshRenderer>();
ren.shadowCastingMode = ShadowCastingMode.Off;
ren.receiveShadows = false;
ren.lightProbeUsage = LightProbeUsage.Off;
ren.reflectionProbeUsage = ReflectionProbeUsage.Off;
ren.material = Material;
meshFilter.mesh = mesh;
Using the default shader the result is something like this:

Rendering
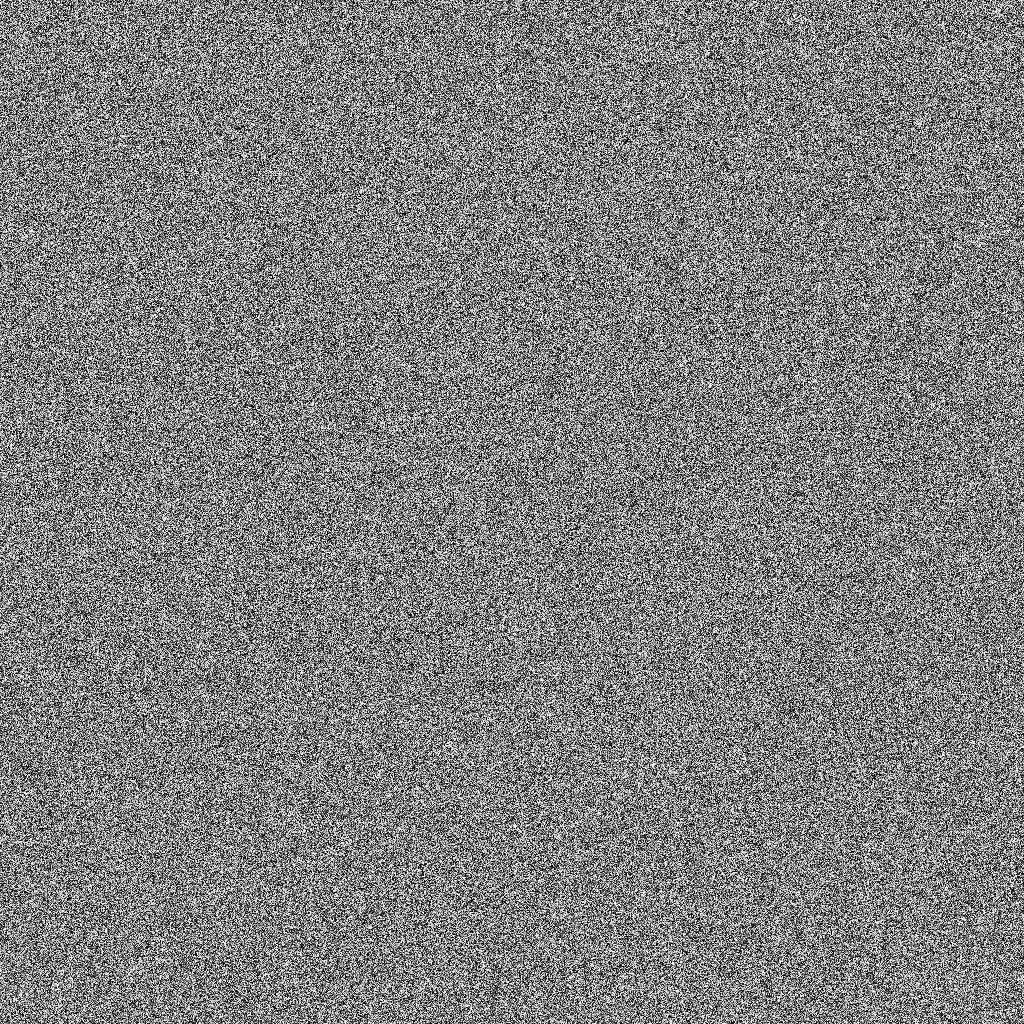
Noise Texture
To simulate the sand grains we are using a noise texture. We can use use an existing texture or create one with the code below:
private const int Size = 1024;

[MenuItem("Desert/Create Noise Texture")]
static void CreateTexture() {
    Texture2D tex = new Texture2D(Size, Size);
    for(int i = 0; i < Size; ++i) {
        for(int j = 0; j < Size; ++j) {
            float random = Random.value;
            Color c = Color.white * random;
            c.a = 1.0f;
            tex.SetPixel(i, j, c);
        }
    }
    byte[] texture = tex.EncodeToPNG();
    System.IO.File.WriteAllBytes(Application.dataPath + "/Textures/DesertNoise.png", texture);
}
This texture simply creates random grey pixels. The texture could be more sophisticated to generate a better results, but for the sake of this article this is a good start. Be sure to disable the Mip Maps generation in the texture settings.
Shader
The vertex shader is quite simple. We use the built-in TRANSFORM_TEX macro so we can tweak the distribution of the noise in the mesh via the tiling parameters in the material. The built-in TRANSFER_SHADOW macro, handles the shadows casted on the mesh. We get the clip pos with UnityObjectToClipPos and the ambient color with the built in ShadeSH9.
The lighting uses a single directional light and is computed using the standard Lambert diffuse model. We just added the “wrap diffuse” technique to tweak the NdotL value, which is a generalization and simplification of the Half Lambert technique presented by Valve. The idea is simple: clamp negative values to 0, scale the NdotL by _WarpDiffuse and add (1 - _WarpDiffuse) to it. This way the final NdotL value will be in the range [1 - _WarpDiffuse, 1] brightening the zones where light incidence is normally low.
VertexOutput vert(VertexInput v) {
    VertexOutput o;

    o.uv = TRANSFORM_TEX(v.uv, _NoiseTex);

    TRANSFER_SHADOW(o)

    o.pos = UnityObjectToClipPos(v.vertex);

    fixed3 worldNormal = UnityObjectToWorldNormal(v.normal);

    fixed NdotL = max(0, dot(worldNormal, _WorldSpaceLightPos0.xyz));
    NdotL = (NdotL * _WarpDiffuse) + (1.0 - _WarpDiffuse);
    o.diff = NdotL * _LightColor0;

    o.ambient = ShadeSH9(fixed4(worldNormal,1));

    return o;
}
The fragment shader just samples the noise texture, applies the value to the _Color, and computes the lighting in the standard way (computes the final lighting by attenuating the diffuse color with built-in SHADOW_ATTENUATION marco attenuation value and adds the ambient color). We added two variables to tweak the shader:
- _MinNoise: ensure that the noise value is in the range [_MinNoise, 1.0], interpolating linearly the original noise value.
- _WhiteThreshold: if the noise is at least _WhiteThreshold make it full white (before lighting) to simulate shiny grains.
fixed4 frag(VertexOutput i) : SV_Target {
fixed noise = tex2D(_NoiseTex, i.uv).r;
noise = lerp(_MinNoise, 1.0, noise);
fixed w = step(_WhiteThreshold, noise);
fixed4 color = (_Color * noise) + w;
fixed shadow = SHADOW_ATTENUATION(i);
fixed3 lighting = i.diff * shadow + i.ambient;
color.rgb *= lighting;
return color;
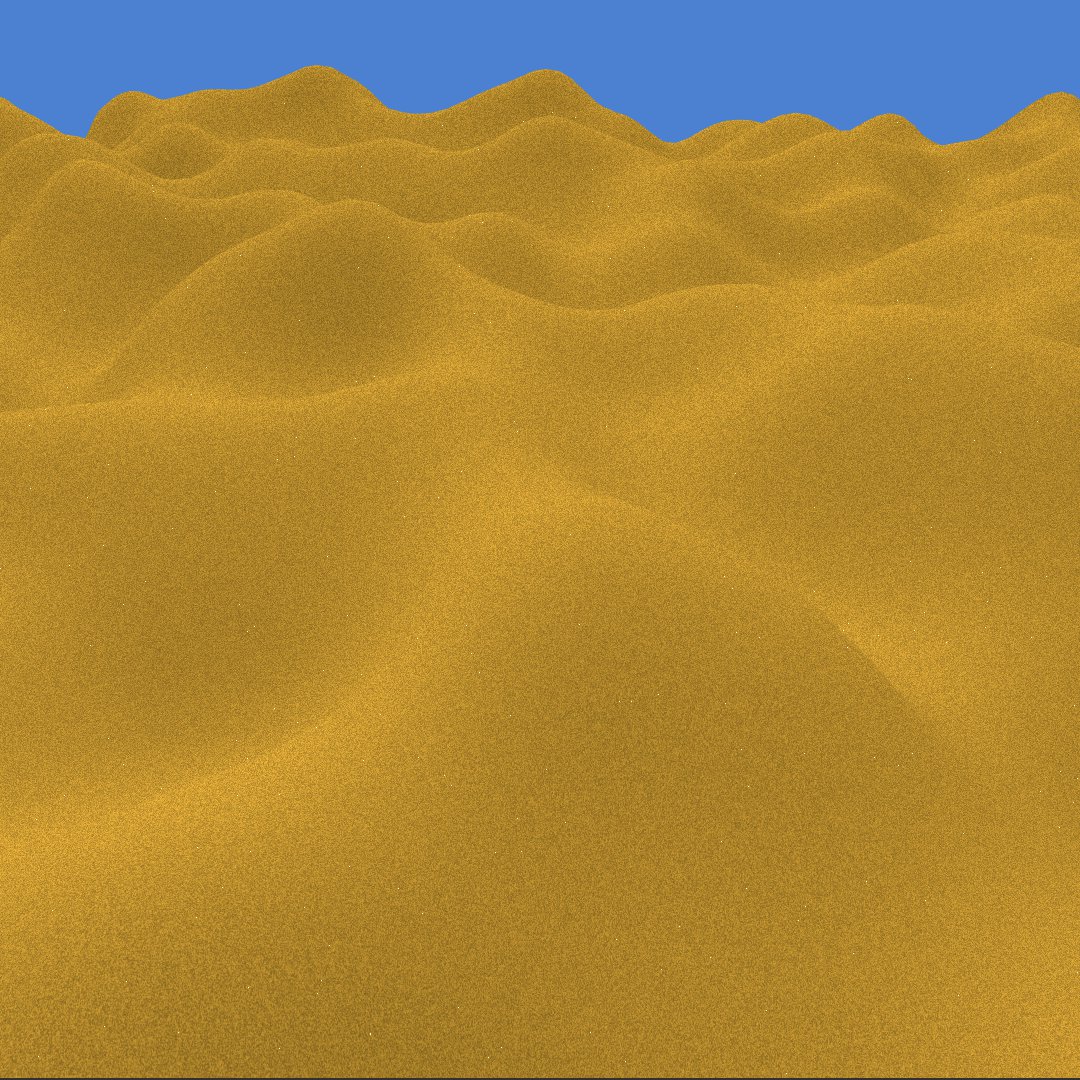
}This is the final look:
Final thoughts
We are quite happy with the result and hope you find it useful. It’s a solid starting point for more realistic results but good enough for Perpetual Wizard. Don’t hesitate to leave a comment below or to contact us directly.